
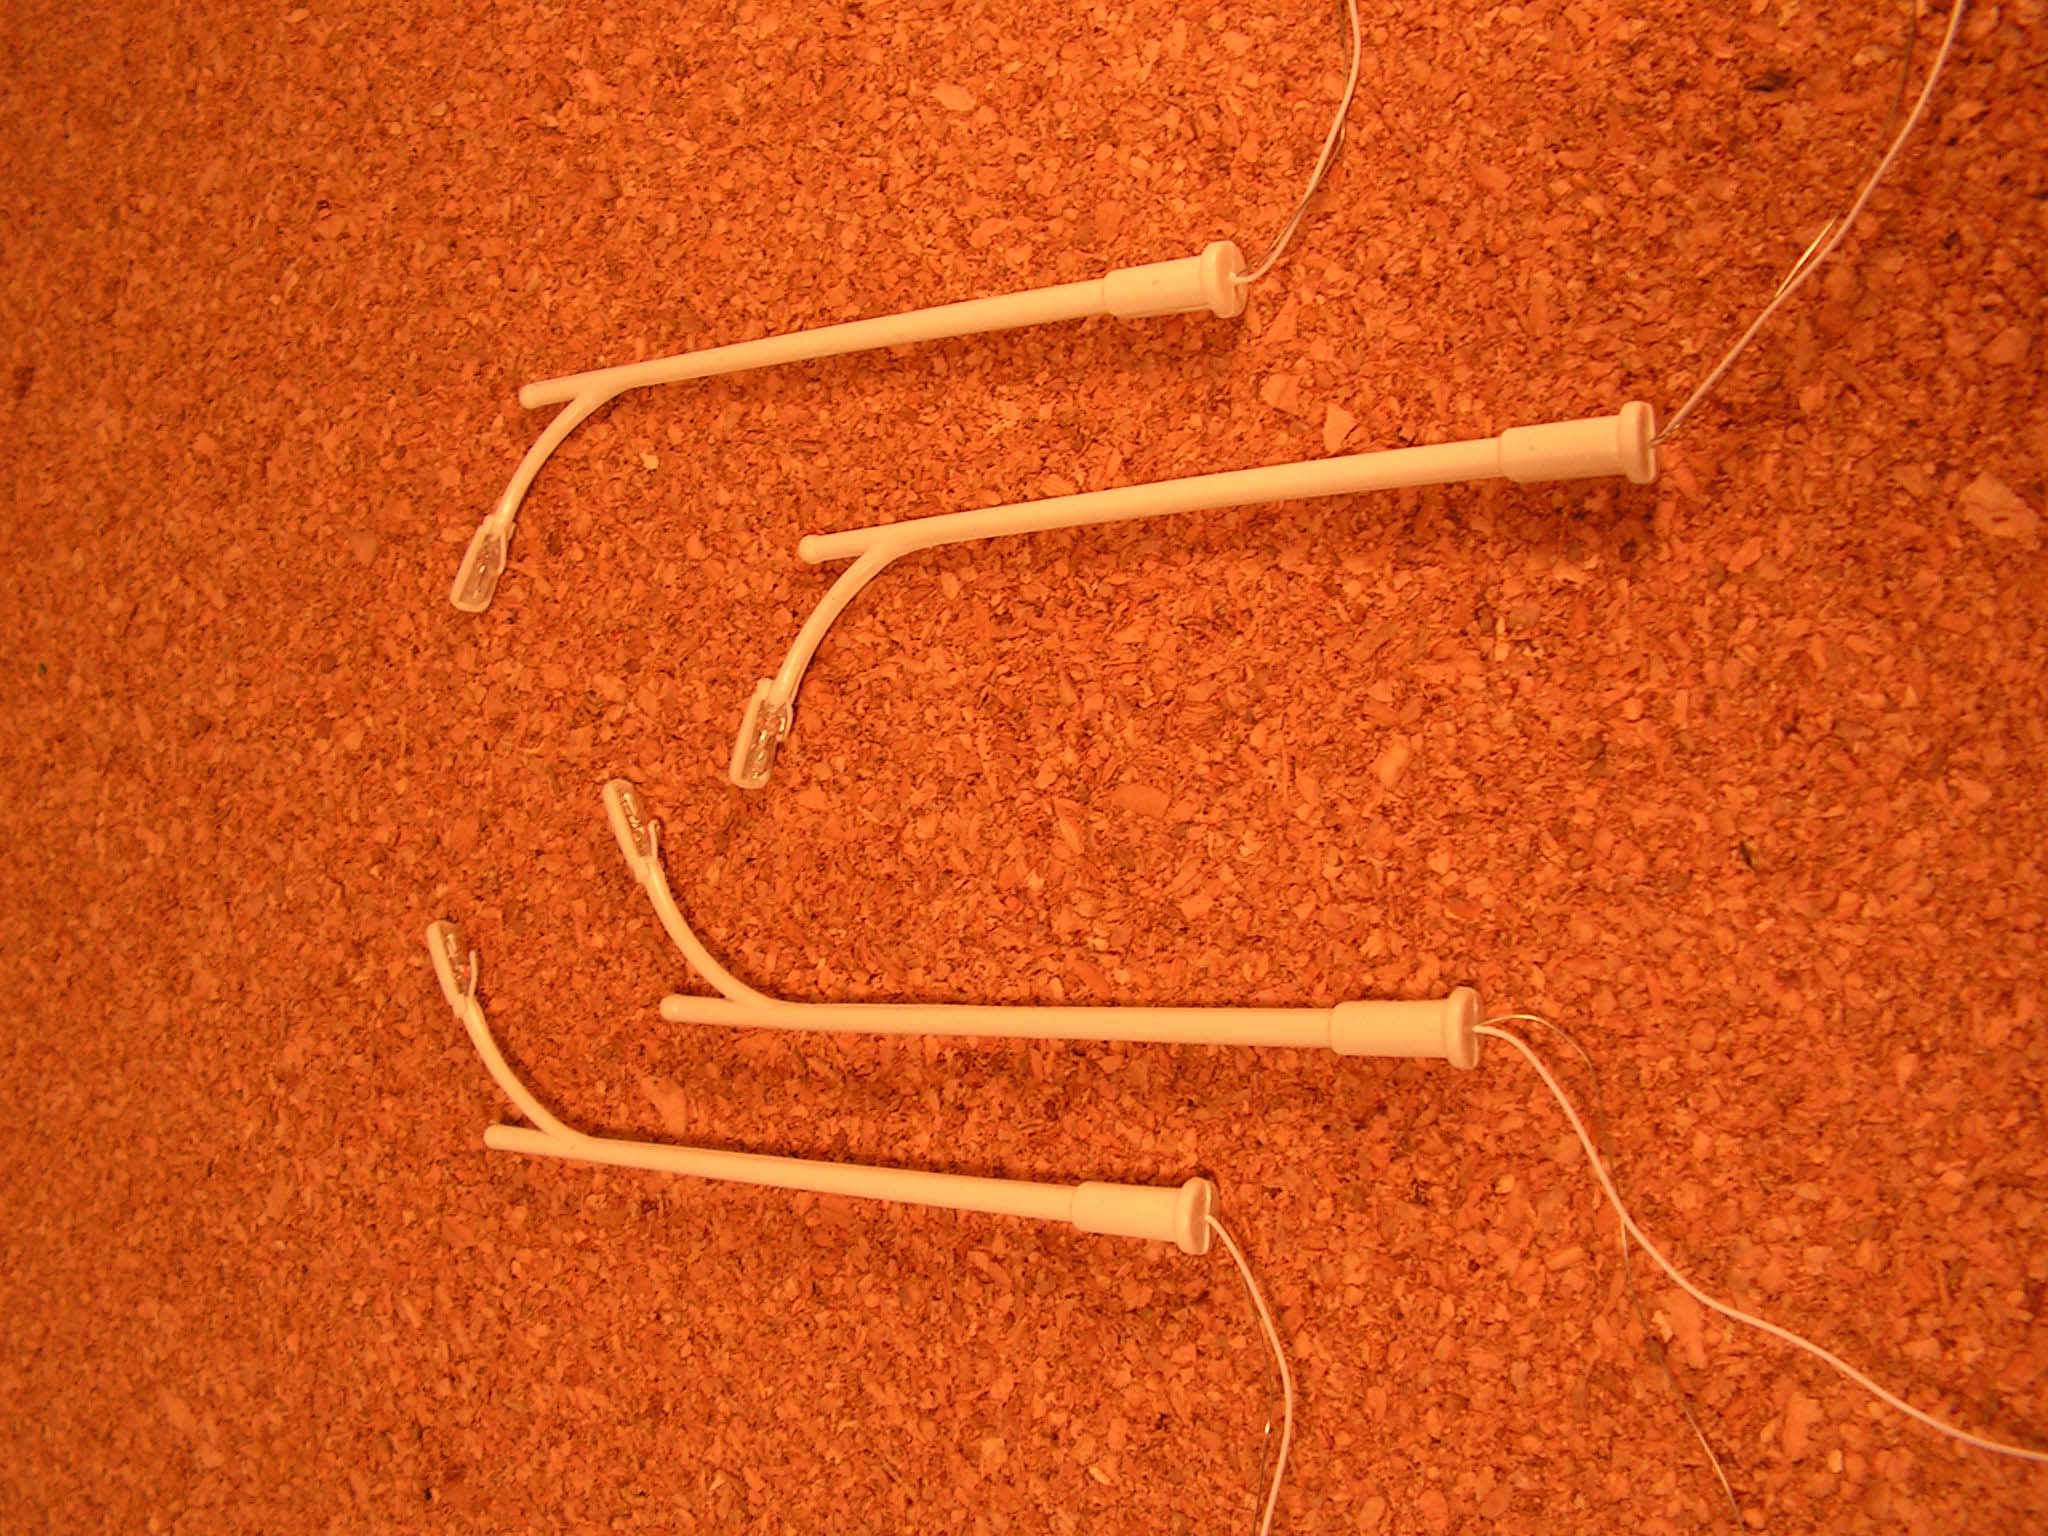
The wires from the light bulb are located in the curved part of the post.


NLMS - Dutch ModelRailroad - www.nlms.info
Streetlights.
Brass streetlights.
Years ago, in 2002, I started making various model layout accessories from brass, including streetlights. Simply made with two or three brass tubes, which slide into each other, and a treaded brass mounting piece.
One of the two wires from the light bulb is soldered at the top, so only one wire is going trough the brass tube. The ground wire is attached between two nuts that also hold the streetlight in place on the layout.
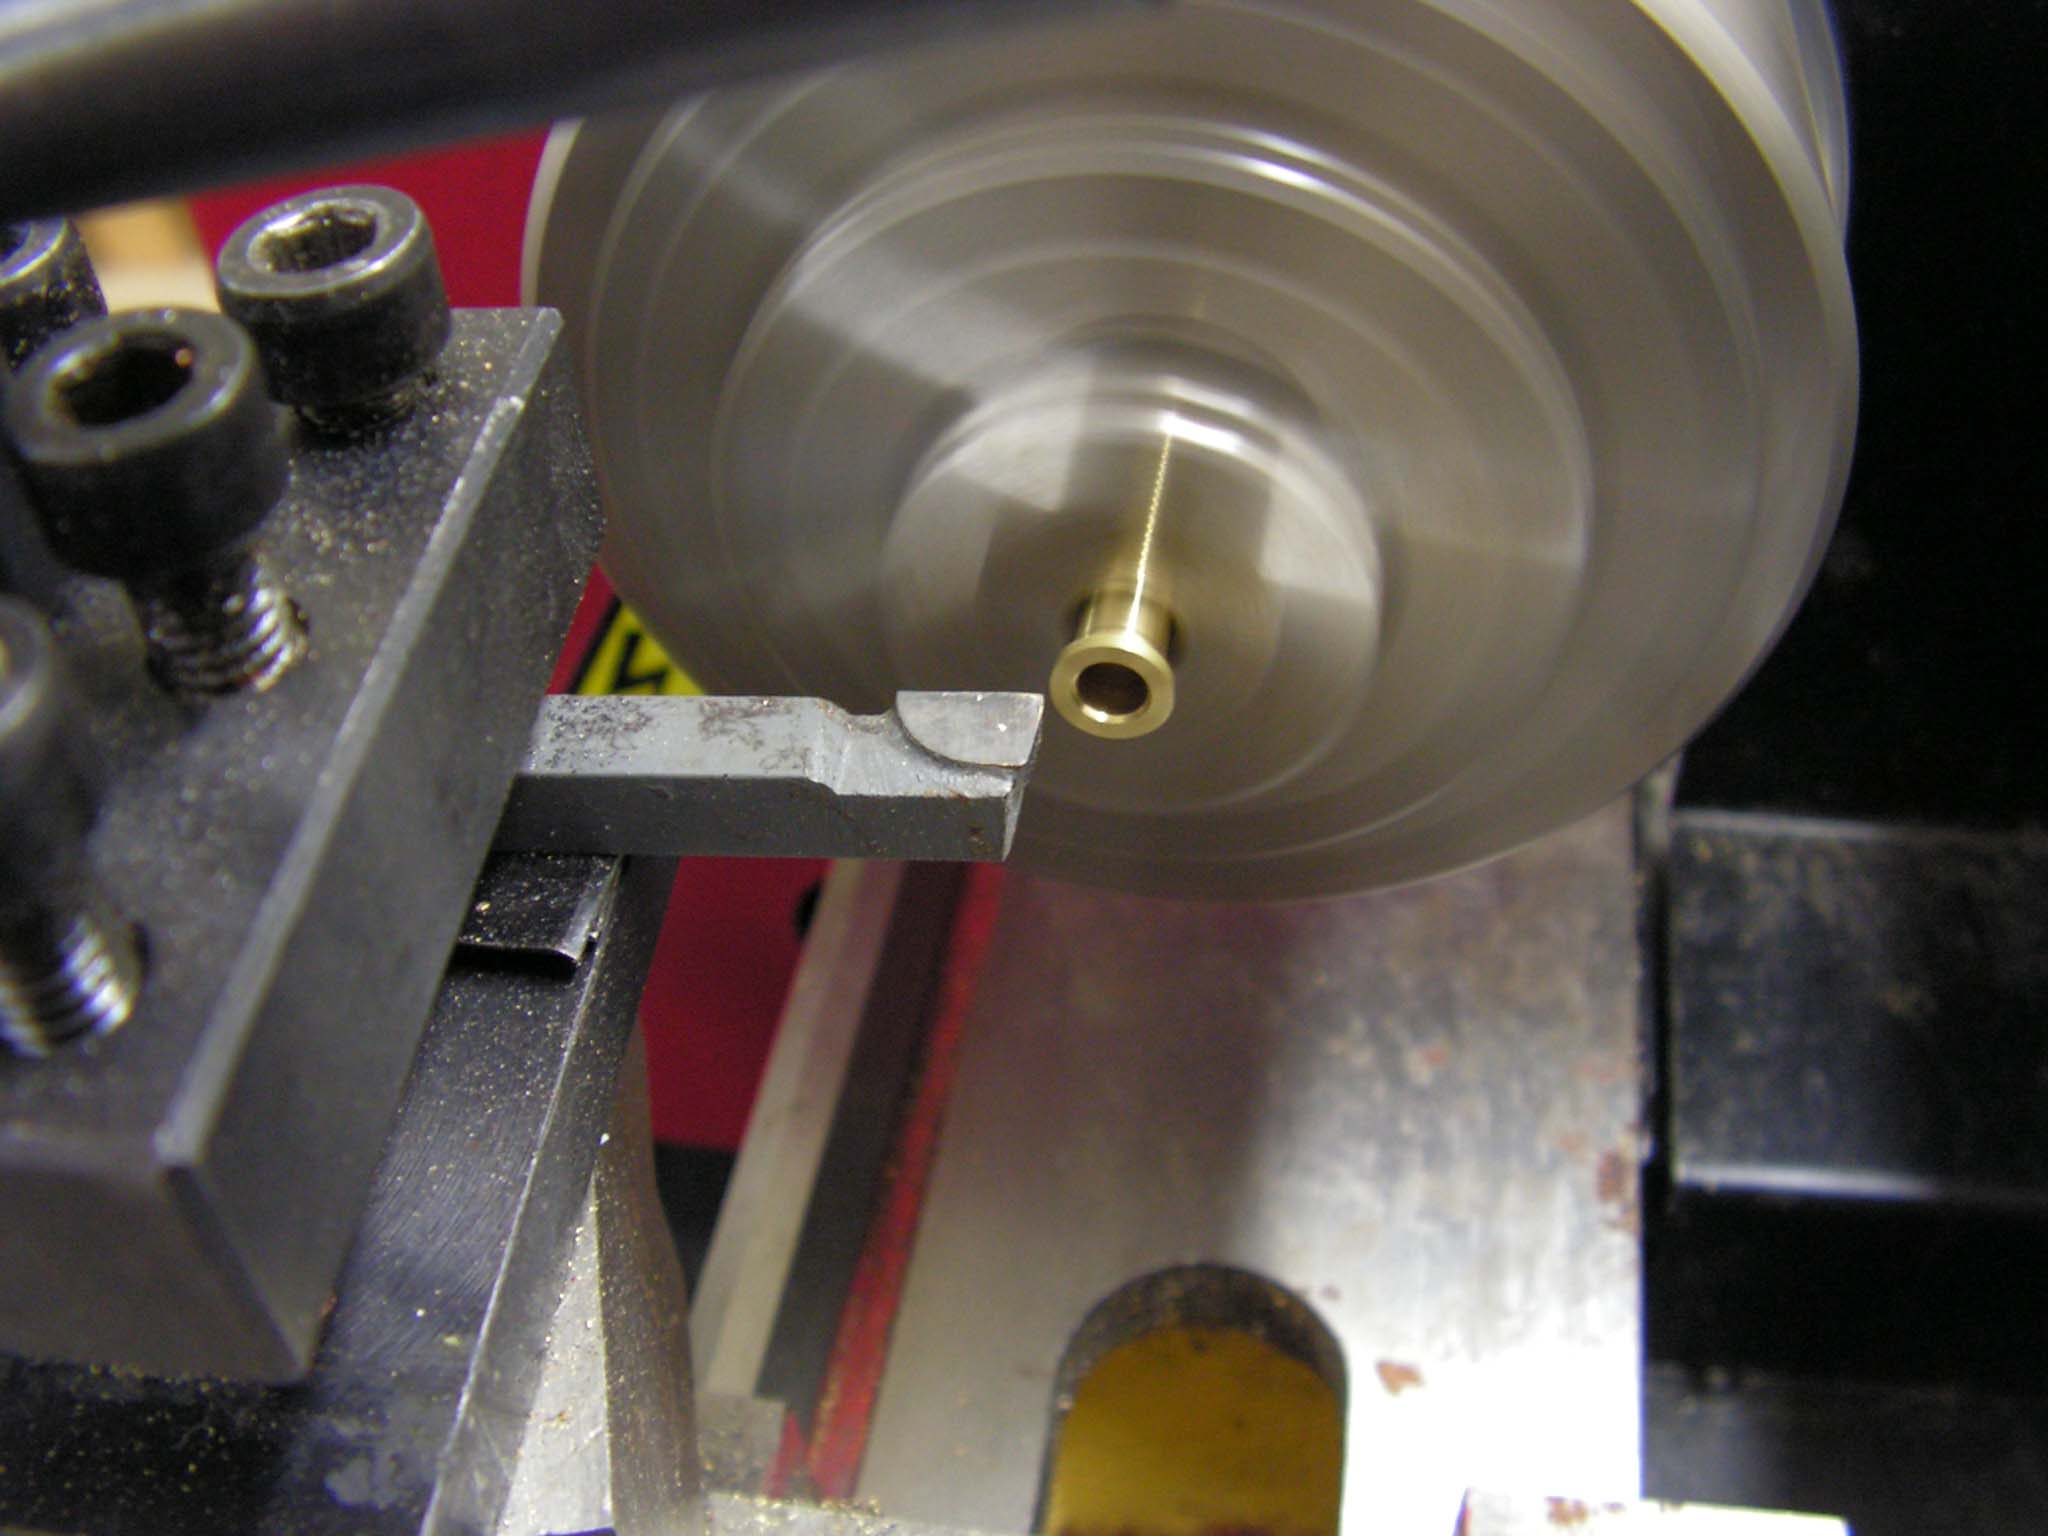
On the lathe I machined the mounting piece, but this can also be made out of small brass bolts, as long as there is a hole drilled in the center to guide the light bulb wire.
Plastic streetlights.
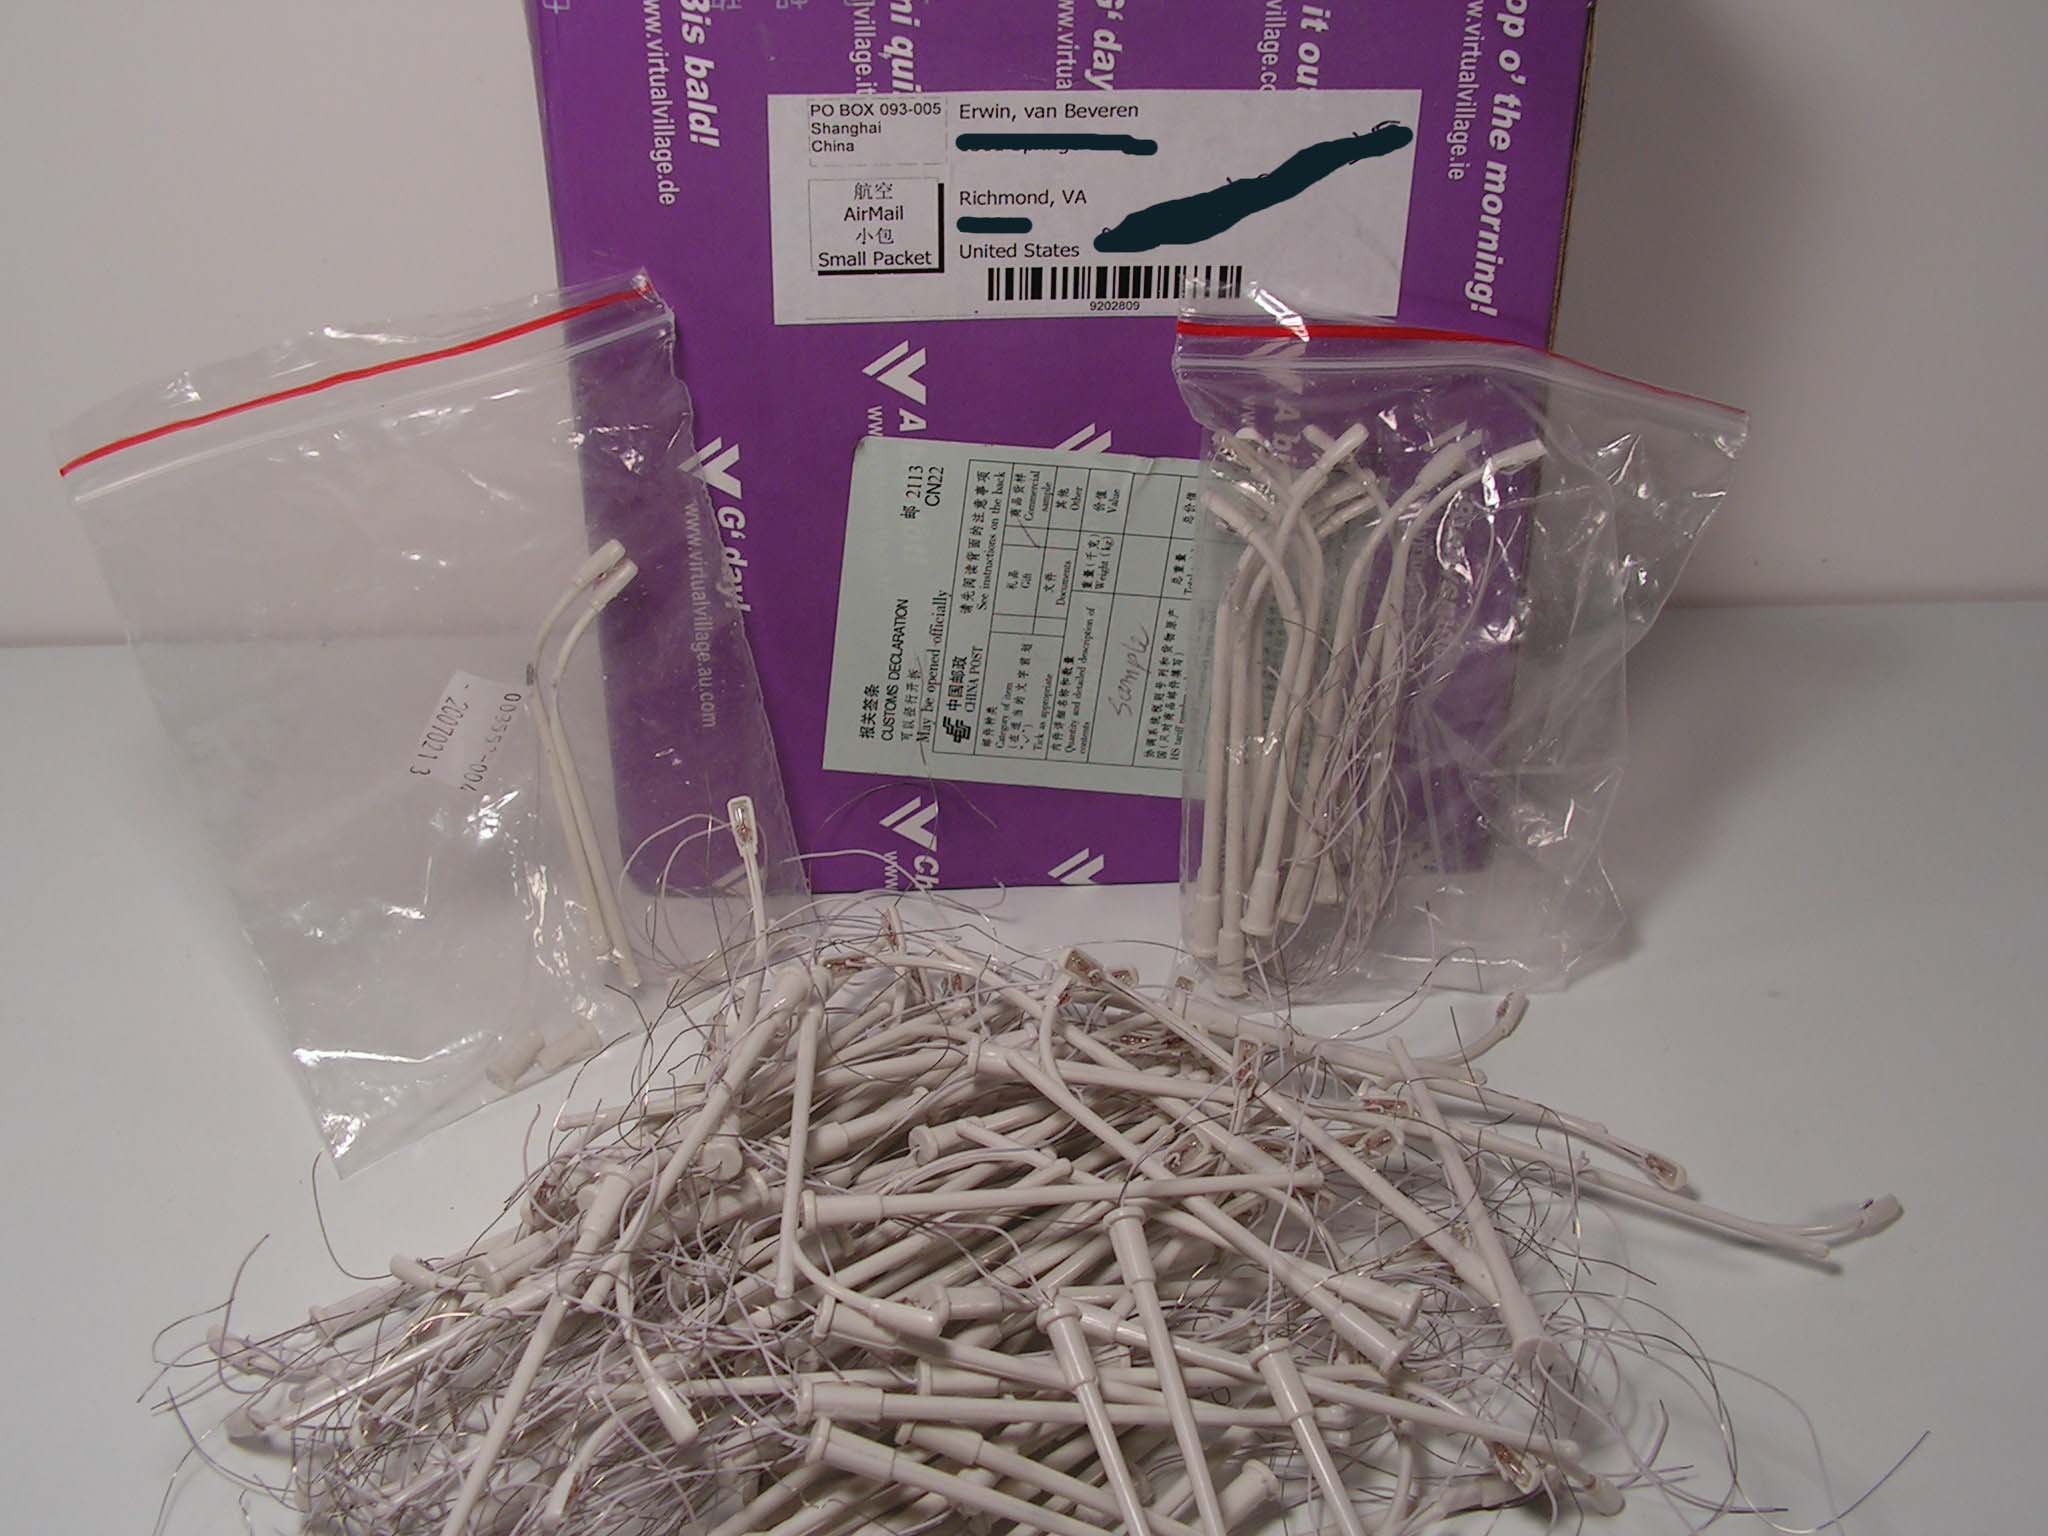
I got a hold on cheap streetlights trough eBay. An eBay store in China sells various stuff, including model train accessories like cars, trees and various lights including lampposts. I ordered some model cars and also choose the regular single lamppost. After the first order of 30 lampposts, I contacted the seller to make a deal on 100 more lampposts.
They are simple unpainted plastic streetlights with an 6 volt light bulb. They can be installed on the layout right a way, but are also easily kit bashed into different, lengths or shapes.
click the image for a larger and high resolution picture.
| Brass streetlights: | |
|
|
Very simple, two brass tubes slides into each other and soldered at
the desired length.
|
|
|
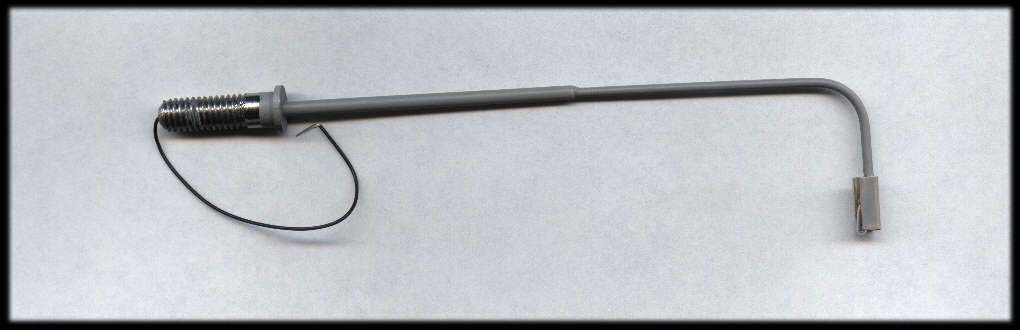
The finished streetlight with a coat of primer, ready to be painted in color. A brass channel covers the light bulb. |
|
|
I machined the mounting pieces on the lathe, not only to physically mount the streetlight, but also to attach the ground wire. |
| Plastic streetlights: | |
|
|
A pile of (130) lampposts, directly from China. |
|
|
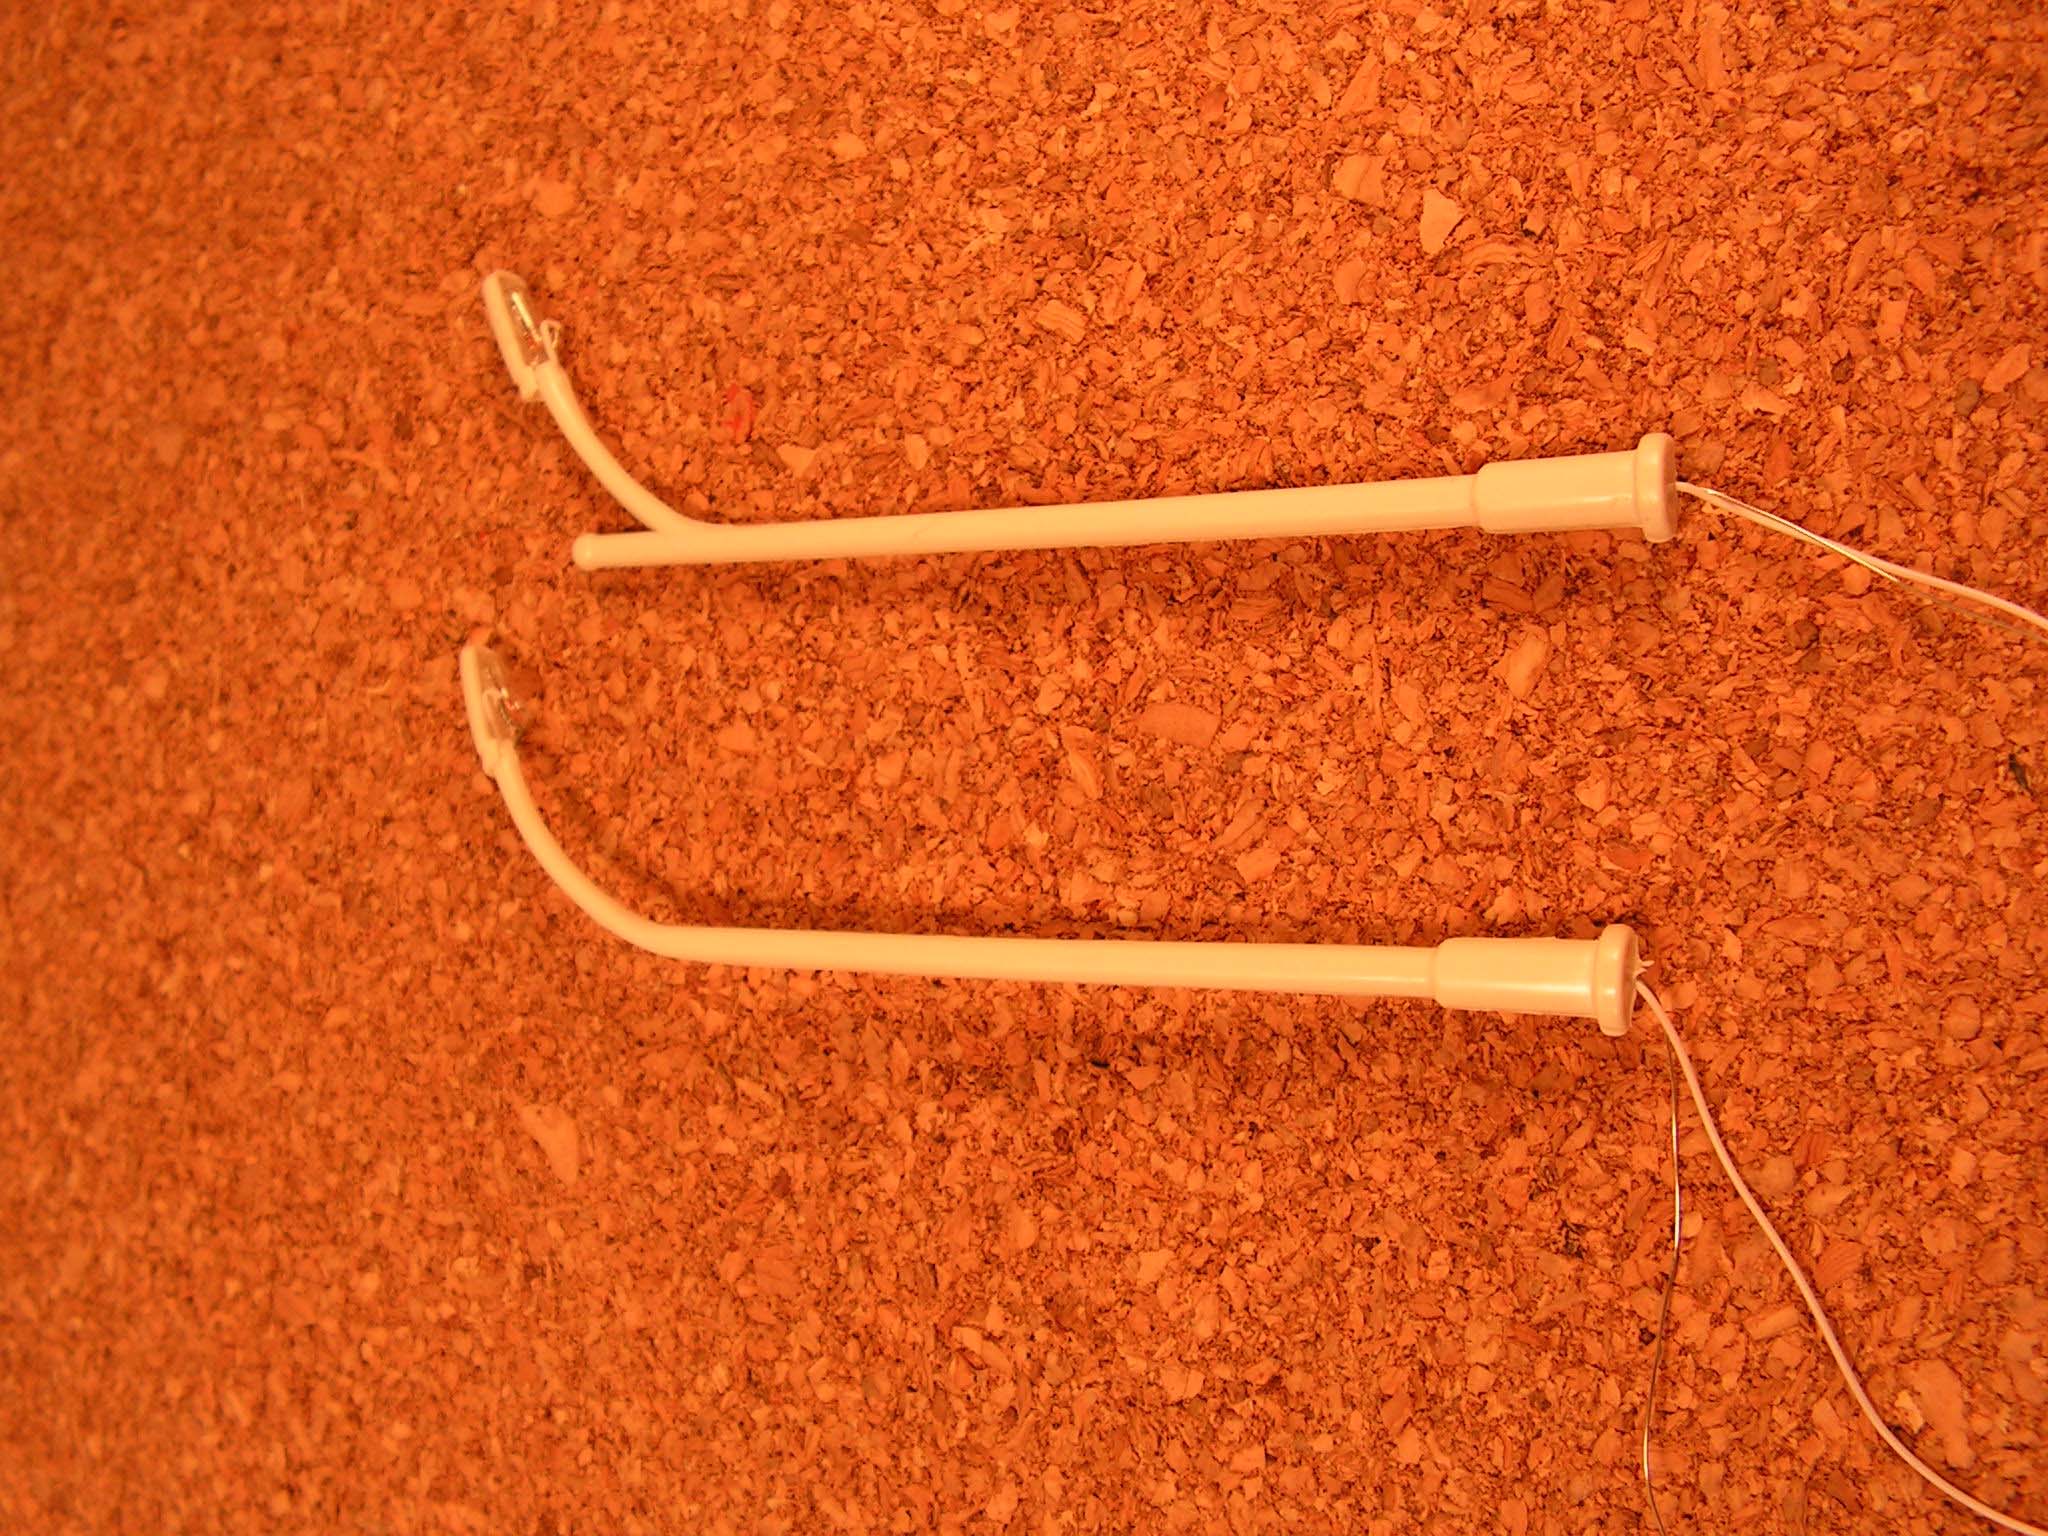
This is how the streetlights look, straight out the bag, ready to be used. |
|
|
With a knife I first cut off the top part of the post and smooth it
with a file. The wires from the light bulb are located in the curved part of the post. |
|
|
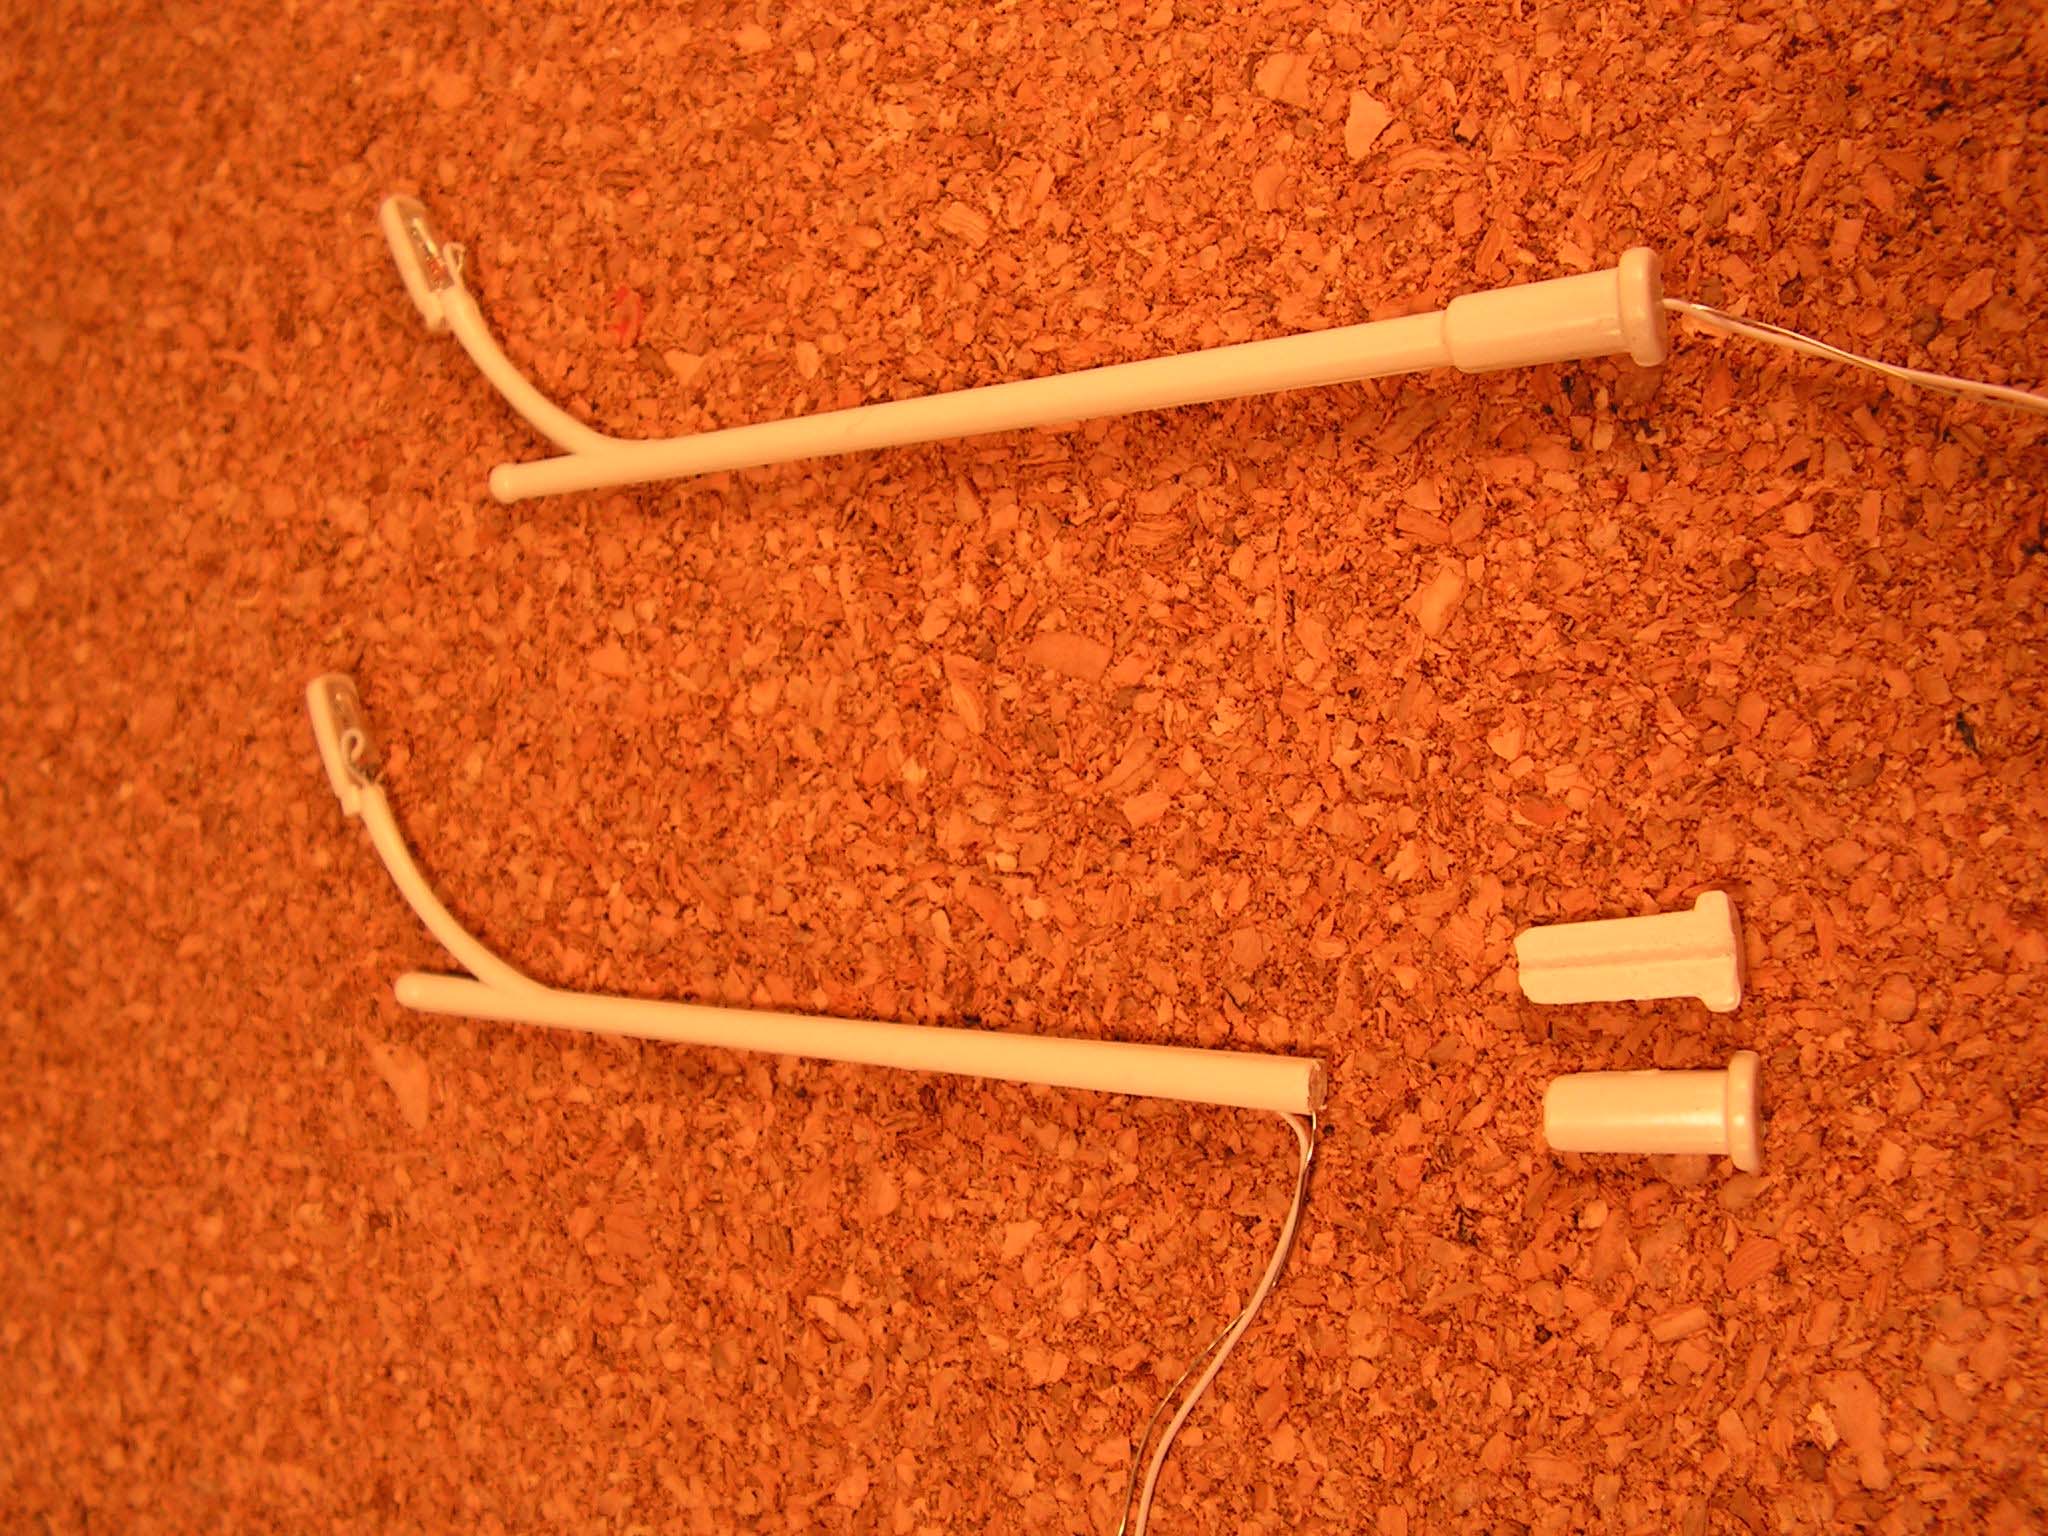
The bottom part can be easily cut in two parts without cutting the wires. |
|
|
If desired, the length can now be changed by adding a plastic, or brass, tube. |
|
|
Since we are cutting with a sharp knife, we might as well cut the whole lamppost. |
|
|
A lamppost is made up out of 4 parts, 2 halve poles, 1 top and the light bulb. |
|
|
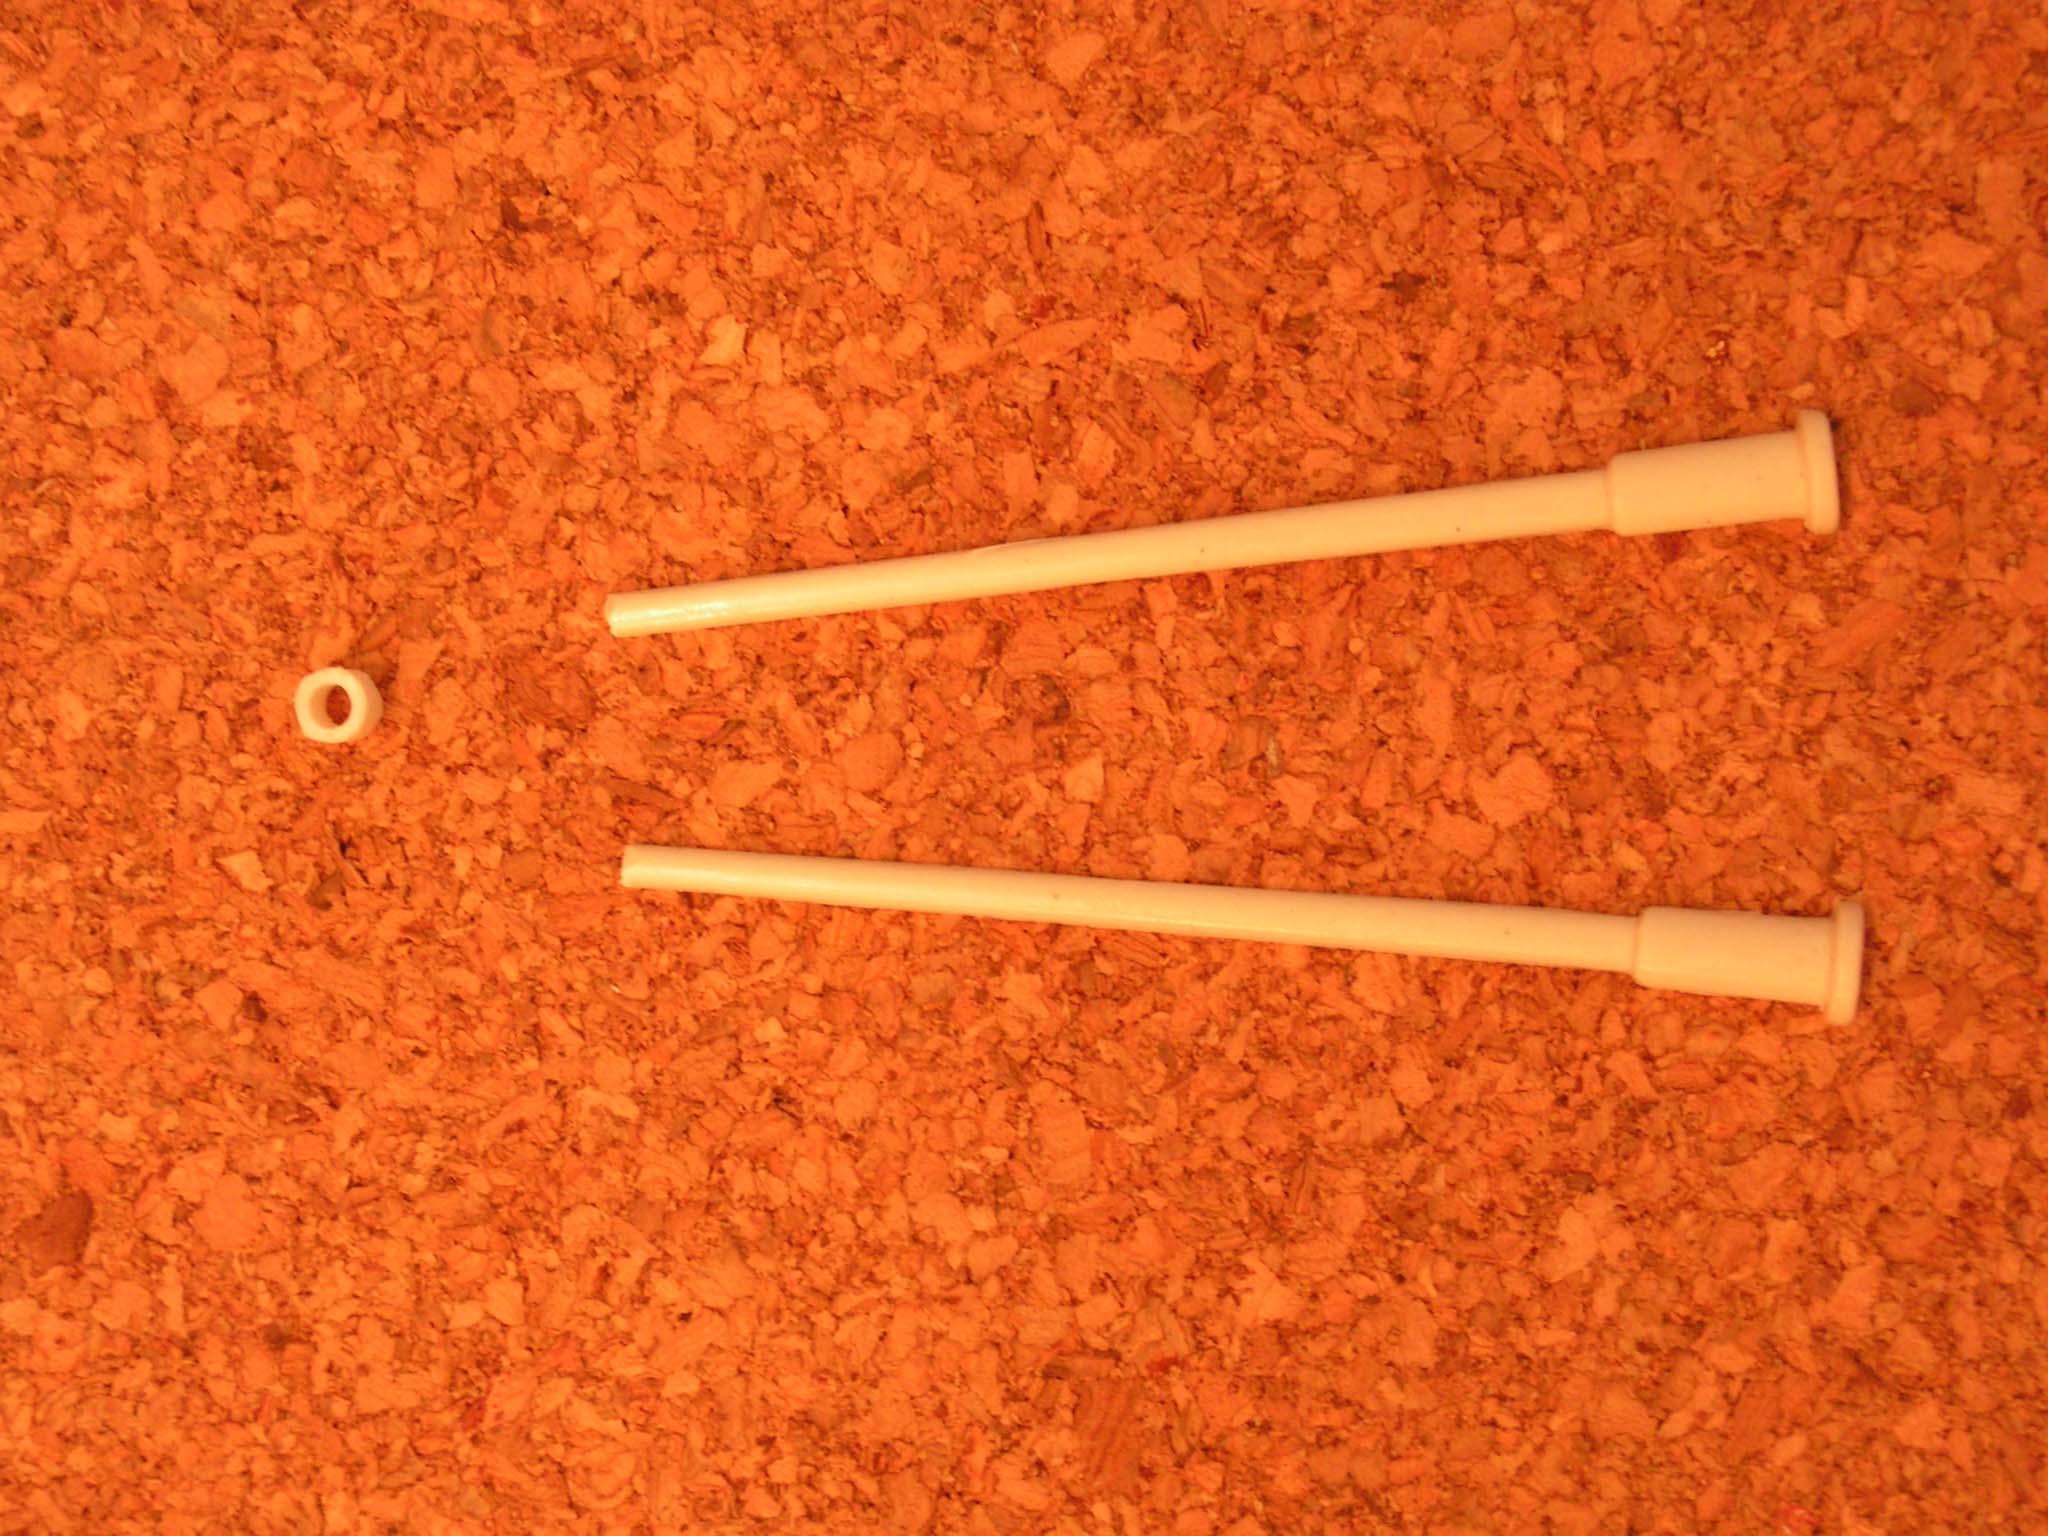
I cut the curved part of the pole off and a small plastic tube will hold the 2 halve poles together, and is used as a suport for the lamp top. |
|
|
The lamppost put bag together. |
|
|
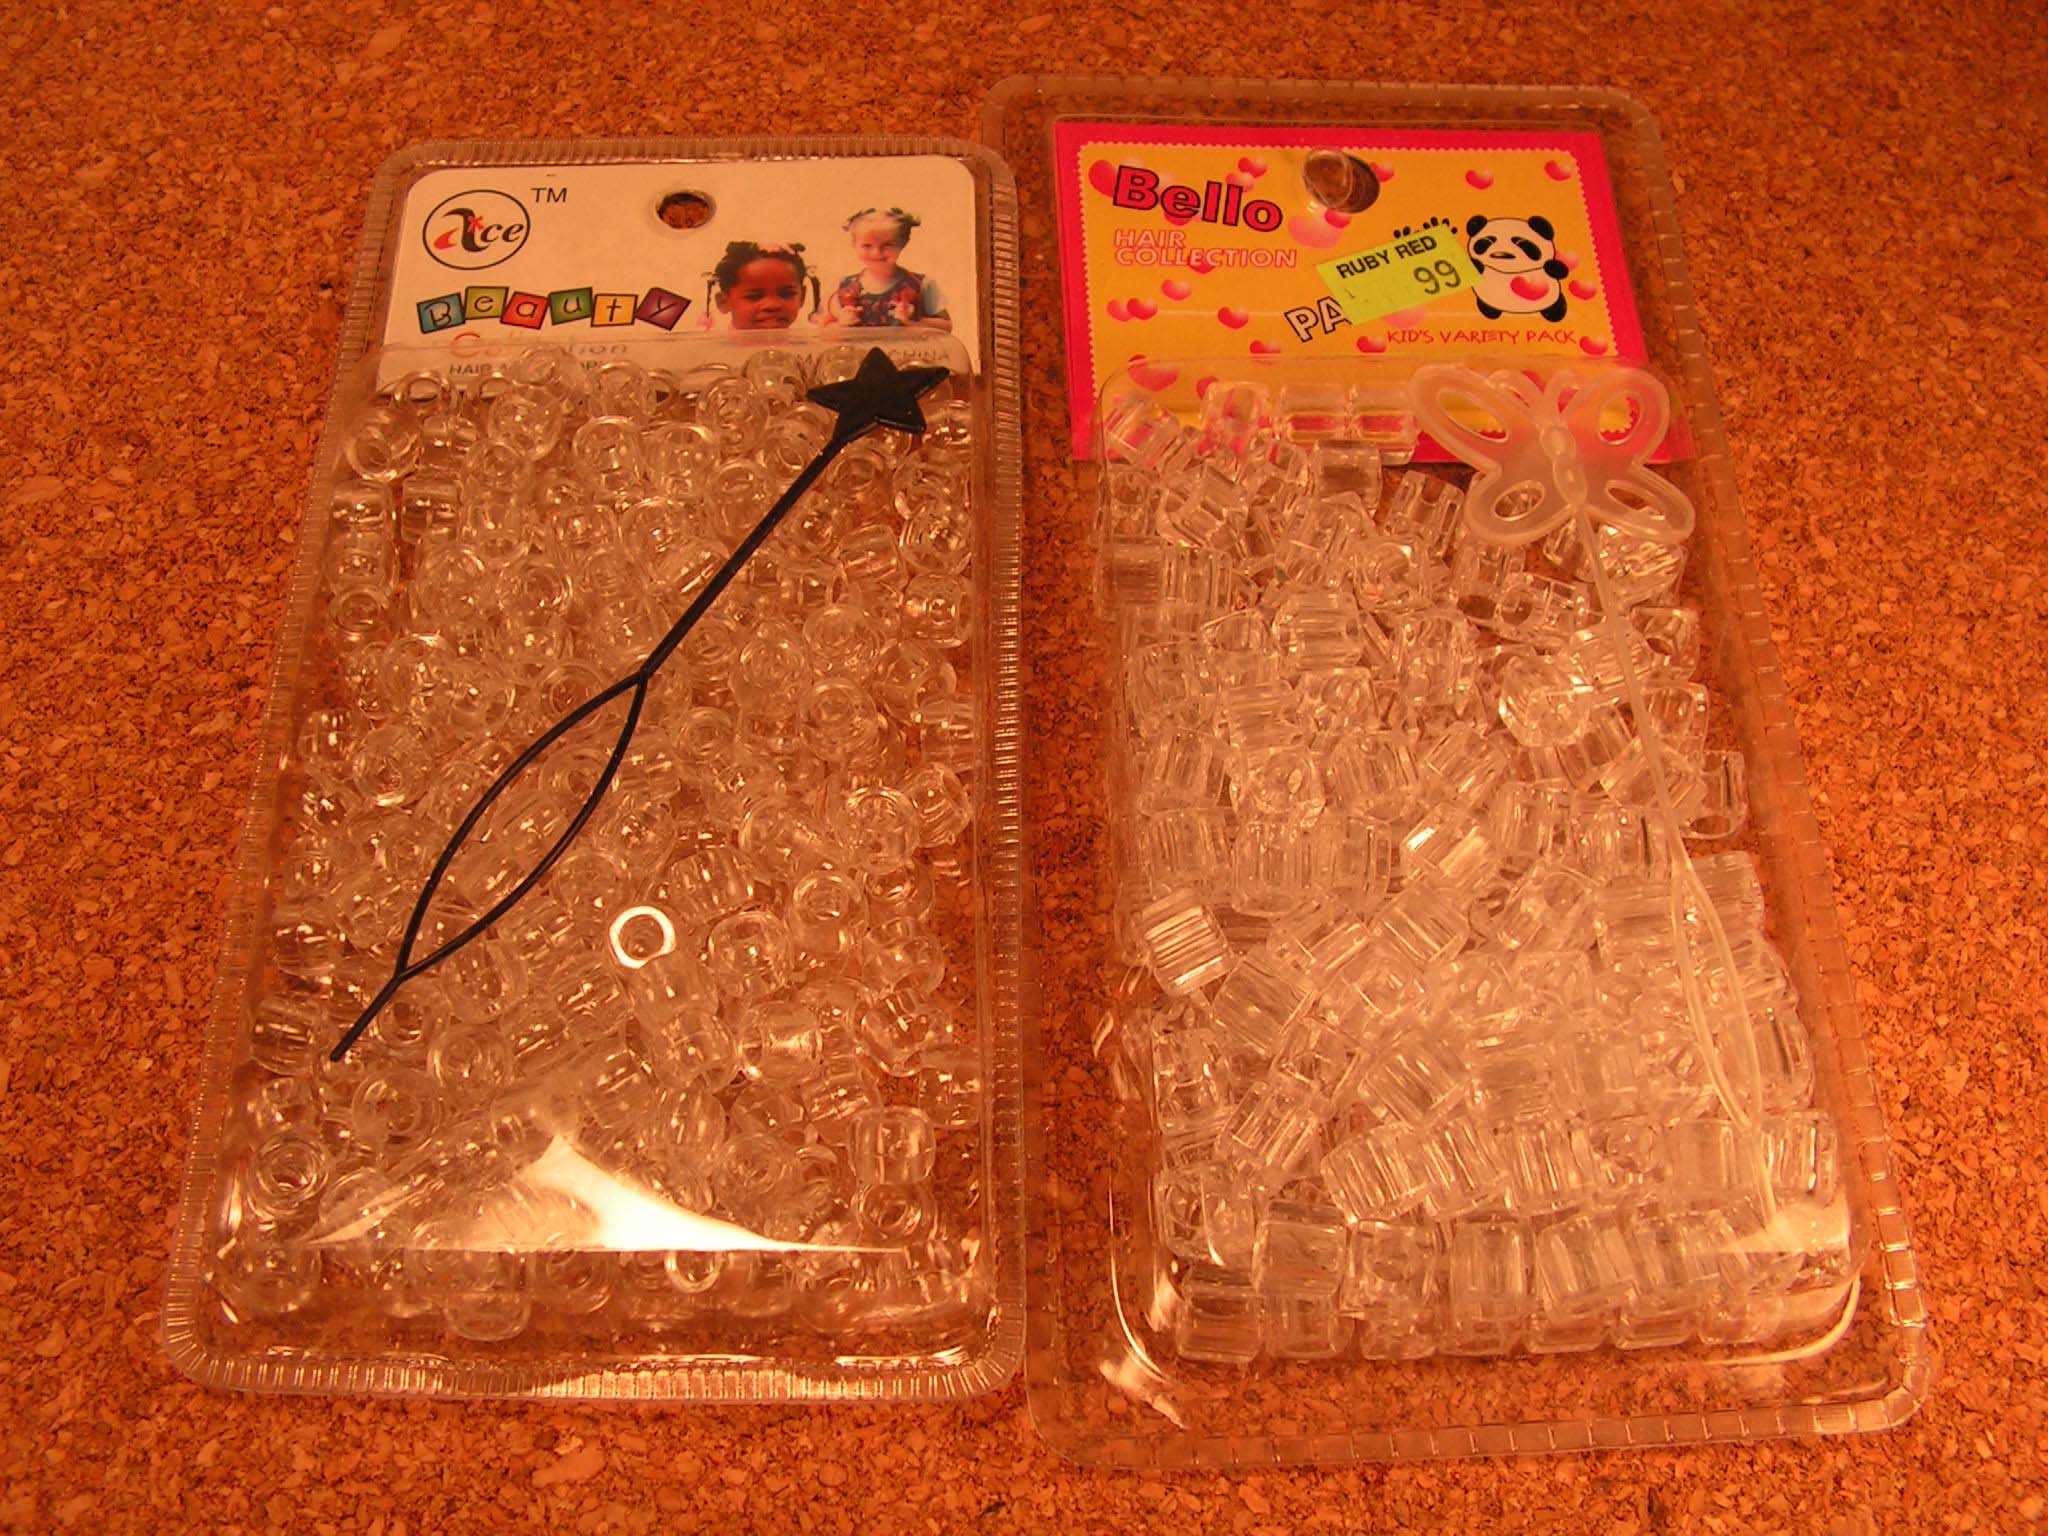
Clear beads in 2 different shapes can be used as lamp top's. |
|
|
Here I used a round bead and a plastic top found in the box with left over parts. |
|
|
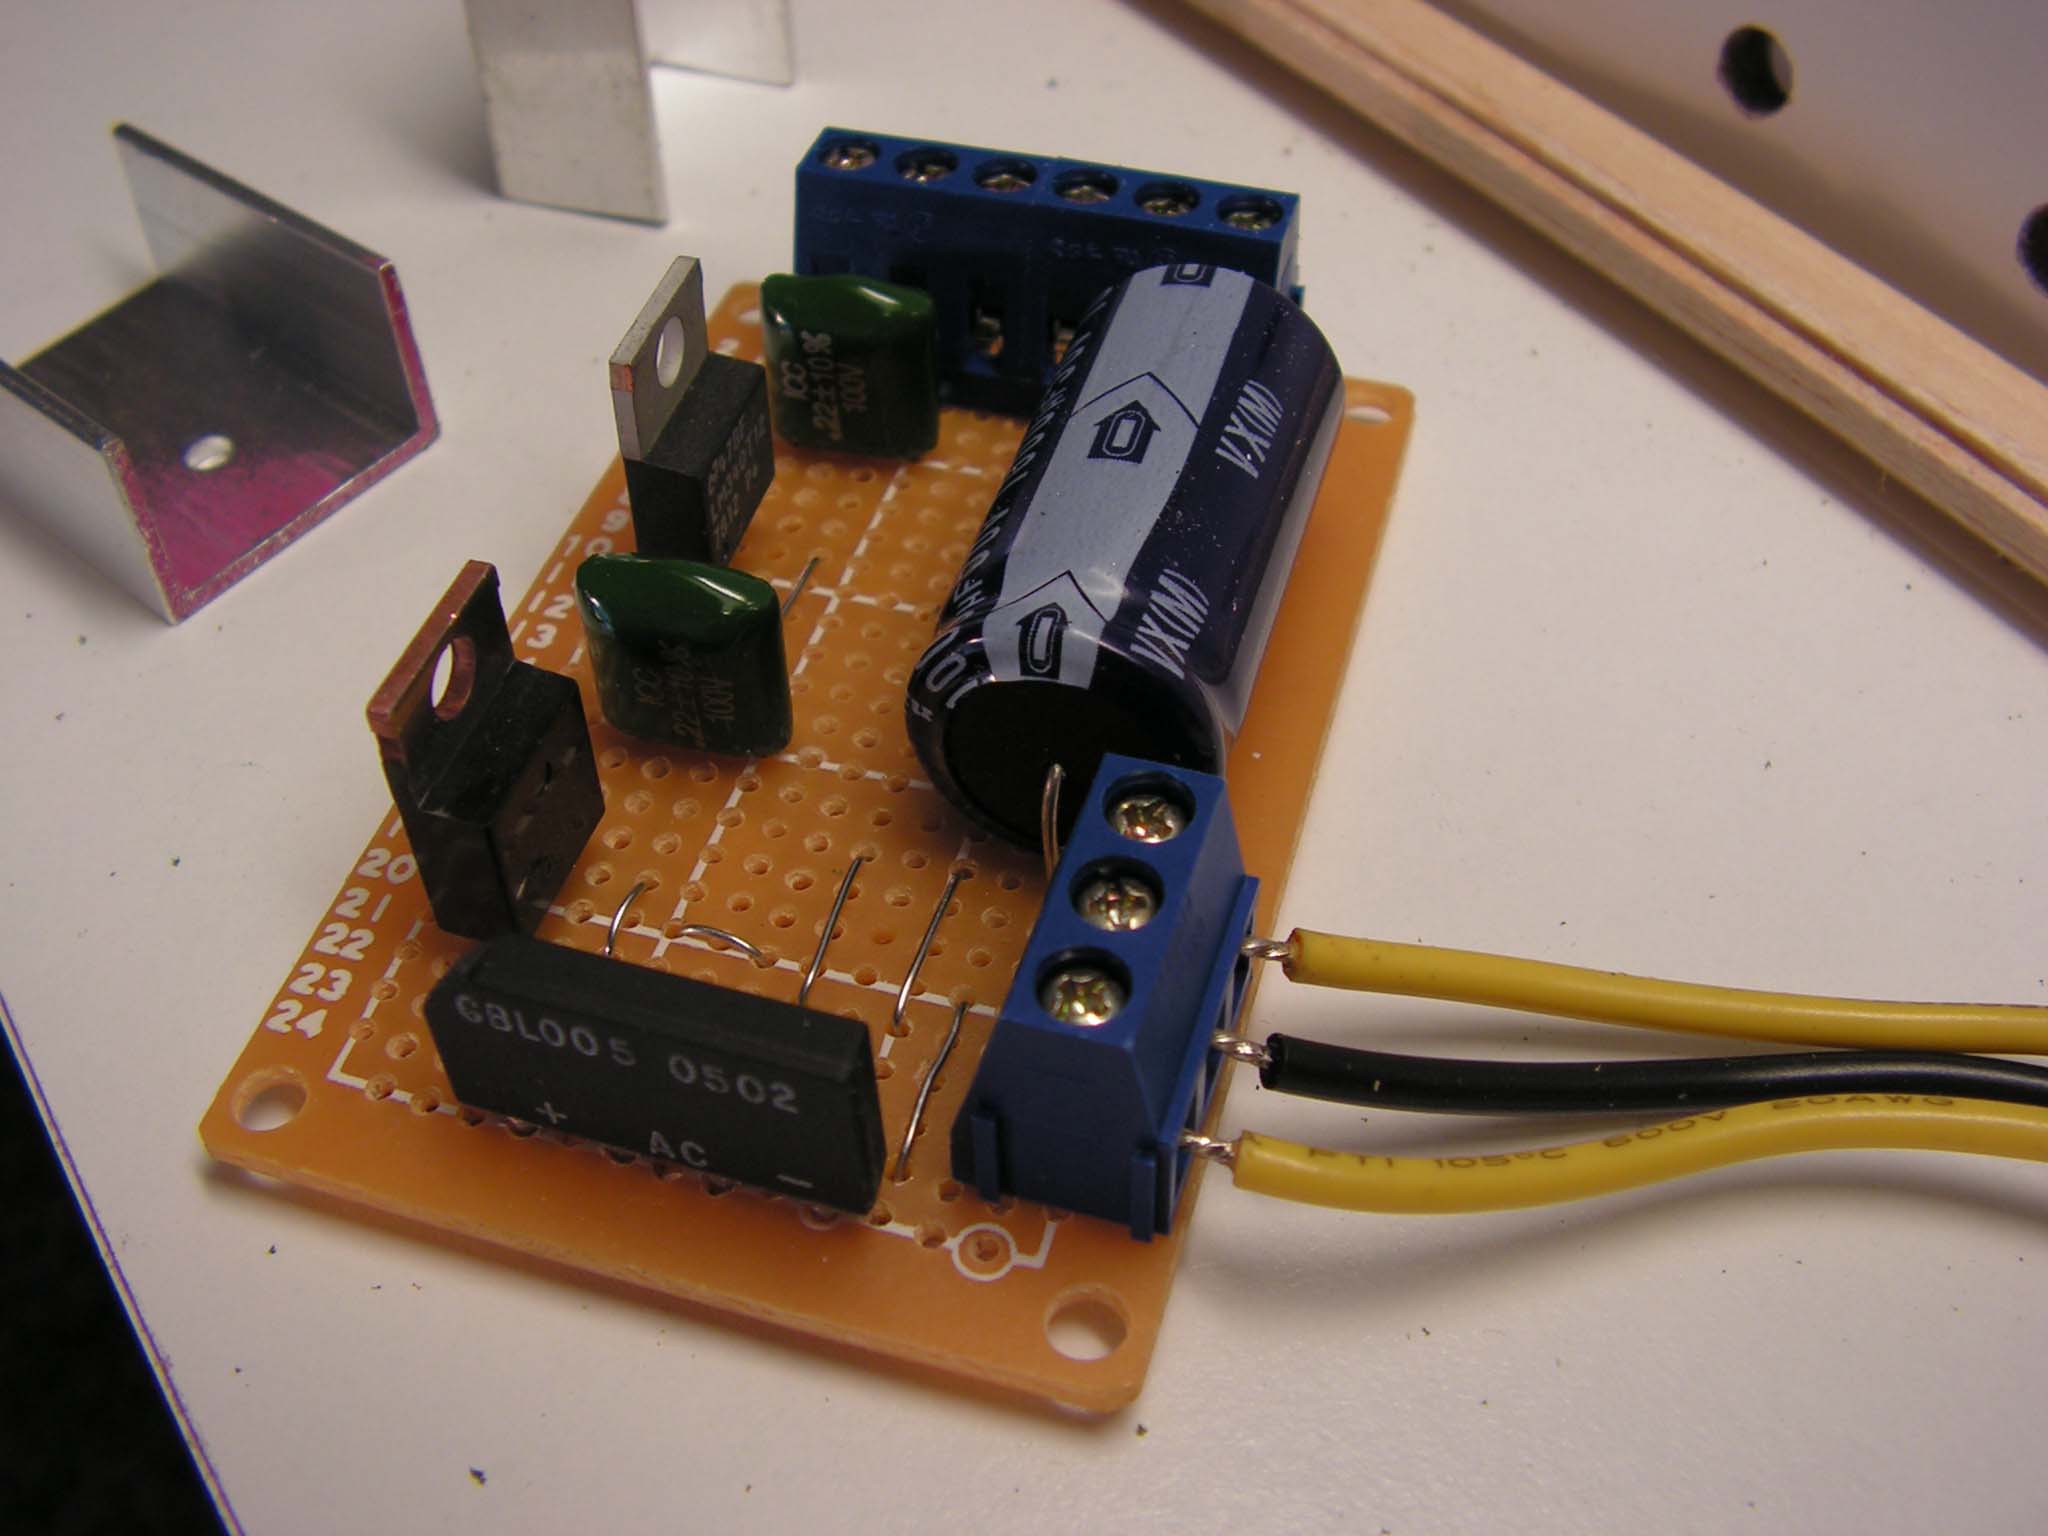
A small power supply circuit made for the streetlights, which let's me hook up the lights, in groups of two - three and four in series, so the light don't shine to bright, and to lower the current draw a bit. |
This page is last updated on 15 July 2012
NLMS - Dutch ModelRailroad - www.nlms.info